Ubuntu22.04にApache Webサーバーをインストールする方法

概要

Ubuntu22.04にApacheをインストールする方法の備忘録

パッケージの更新

Plain text
Copy to clipboard
Open code in new window
EnlighterJS 3 Syntax Highlighter
sudo apt update
sudo apt upgrade
sudo apt update sudo apt upgrade
sudo apt update
sudo apt upgrade

UFW

Plain text
Copy to clipboard
Open code in new window
EnlighterJS 3 Syntax Highlighter
ufw allow http
ufw allow https
ufw reload
ufw allow http ufw allow https ufw reload
ufw allow http
ufw allow https
ufw reload

リポジトリ追加

Plain text
Copy to clipboard
Open code in new window
EnlighterJS 3 Syntax Highlighter
sudo add-apt-repository ppa:ondrej/apache2
sudo apt-get update
sudo add-apt-repository ppa:ondrej/apache2 sudo apt-get update
sudo add-apt-repository ppa:ondrej/apache2

sudo apt-get update 

Apacheのインストール

Plain text
Copy to clipboard
Open code in new window
EnlighterJS 3 Syntax Highlighter
apt -y install apache2

設定

Plain text
Copy to clipboard
Open code in new window
EnlighterJS 3 Syntax Highlighter
vi /etc/apache2/conf-enabled/security.conf
# 25行目:変更
ServerTokens  Prod
vi /etc/apache2/conf-enabled/security.conf # 25行目:変更 ServerTokens  Prod
vi /etc/apache2/conf-enabled/security.conf
# 25行目:変更
ServerTokens  Prod
Plain text
Copy to clipboard
Open code in new window
EnlighterJS 3 Syntax Highlighter
vi /etc/apache2/mods-enabled/dir.conf
# 2行目:ディレクトリ名のみでアクセスできるファイル名を確認
DirectoryIndex index.html index.cgi index.pl index.php index.xhtml index.htm
vi /etc/apache2/mods-enabled/dir.conf # 2行目:ディレクトリ名のみでアクセスできるファイル名を確認 DirectoryIndex index.html index.cgi index.pl index.php index.xhtml index.htm
vi /etc/apache2/mods-enabled/dir.conf
# 2行目:ディレクトリ名のみでアクセスできるファイル名を確認
DirectoryIndex index.html index.cgi index.pl index.php index.xhtml index.htm
Plain text
Copy to clipboard
Open code in new window
EnlighterJS 3 Syntax Highlighter
# vi /etc/apache2/apache2.conf
# 70行目:サーバー名追記
ServerName <FQDN>
# 172行目:変更
AllowOverride ALL
# vi /etc/apache2/apache2.conf # 70行目:サーバー名追記 ServerName <FQDN> # 172行目:変更 AllowOverride ALL
# vi /etc/apache2/apache2.conf
# 70行目:サーバー名追記
ServerName <FQDN>
# 172行目:変更
AllowOverride ALL
Plain text
Copy to clipboard
Open code in new window
EnlighterJS 3 Syntax Highlighter
vi /etc/apache2/sites-available/000-default.conf
# 11行目:管理者アドレス変更
ServerAdmin <your mailaddress>
vi /etc/apache2/sites-available/000-default.conf # 11行目:管理者アドレス変更 ServerAdmin <your mailaddress>
vi /etc/apache2/sites-available/000-default.conf
# 11行目:管理者アドレス変更
ServerAdmin <your mailaddress>

Apache再起動

Plain text
Copy to clipboard
Open code in new window
EnlighterJS 3 Syntax Highlighter
systemctl restart apache2

動作確認

Plain text
Copy to clipboard
Open code in new window
EnlighterJS 3 Syntax Highlighter
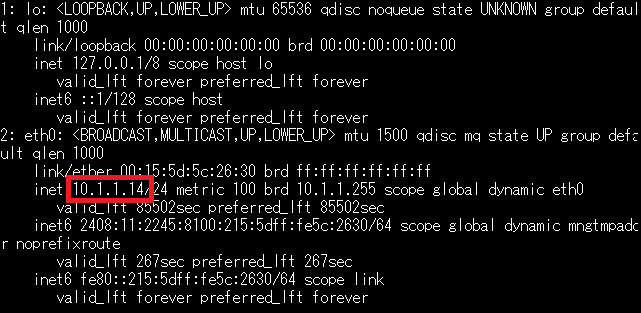
ip addr
ip addr
ip addr

IPアドレスを確認します

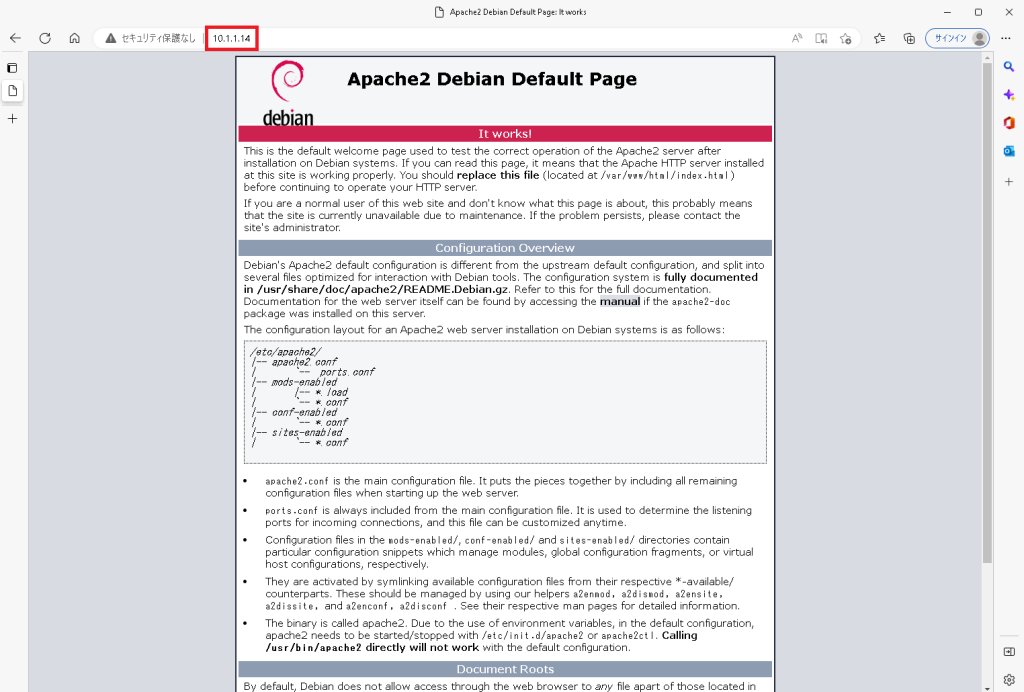
確認したIPをWebブラウザのURL欄に入力しEnterを押してApacheが正常にインストールしていることを確認してください。