もくじ
GitHubのアカウント作成
1.GitHubにアクセス
2.GitHubに登録するのボタンをクリック
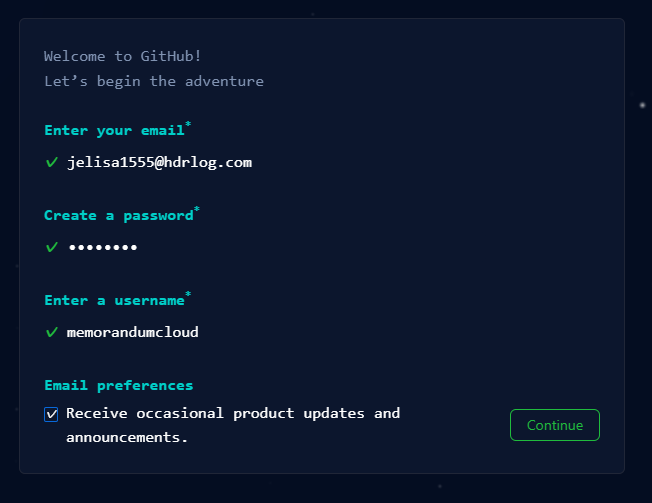
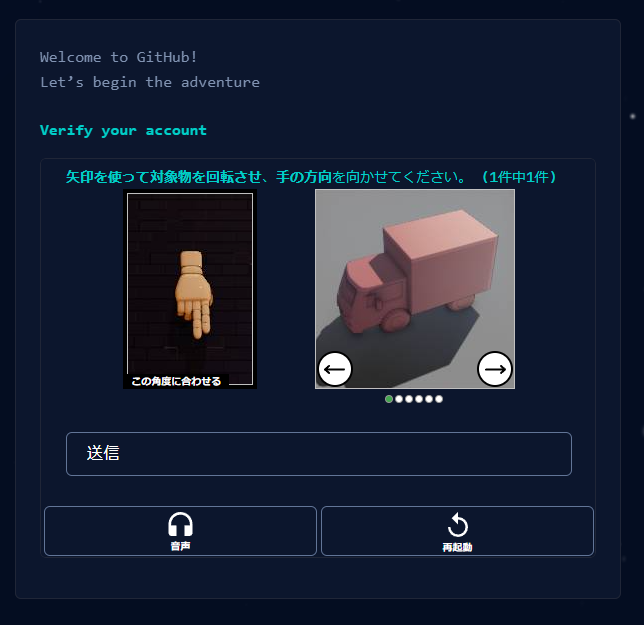
3.Username、Email address、Passwordを入力、Verify your accountの検証するのボタンを押して指示に従って操作を行い、Create Accountのボタンをクリック
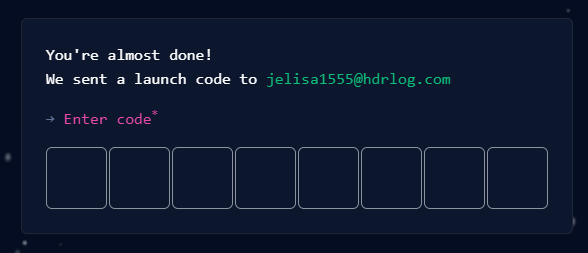
メール認証を行います。
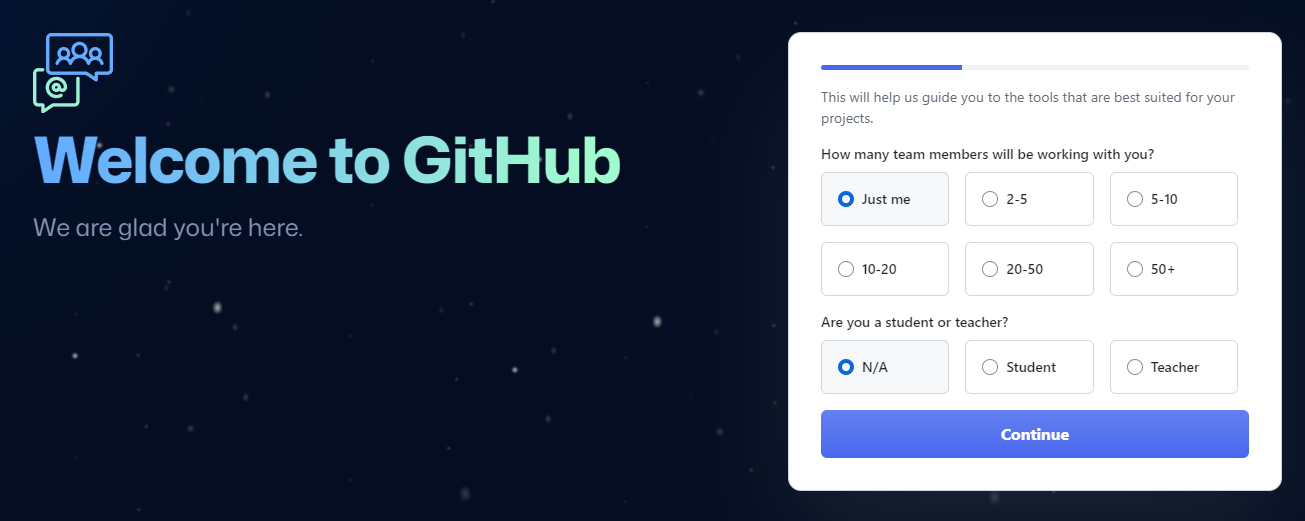
質問に答えます。
一緒に働くチームメンバーは何人ですか?
あなたは学生ですか、それとも教師ですか?
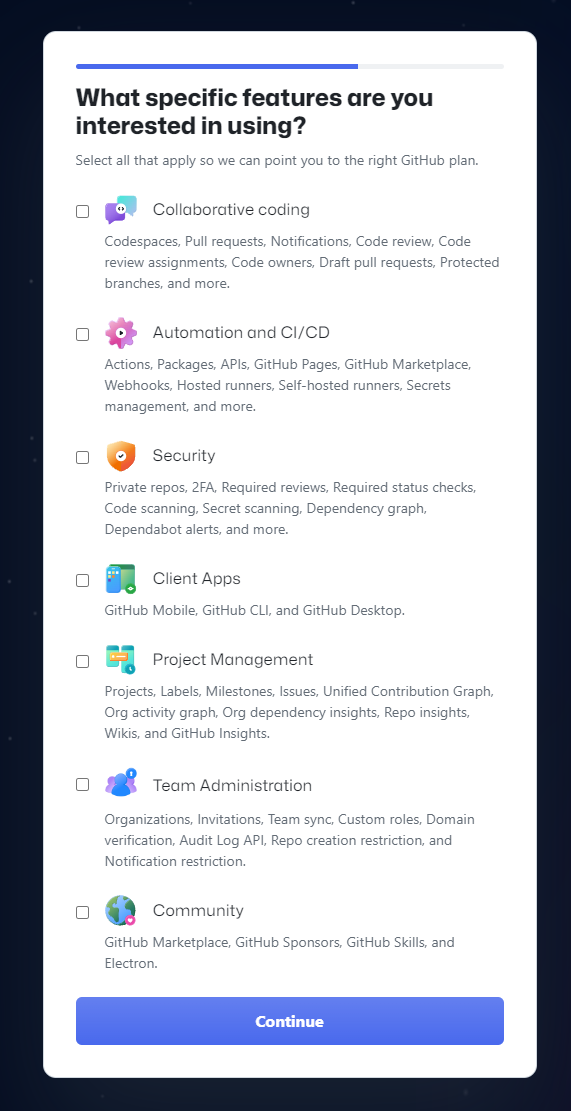
興味ある機能を選択します。
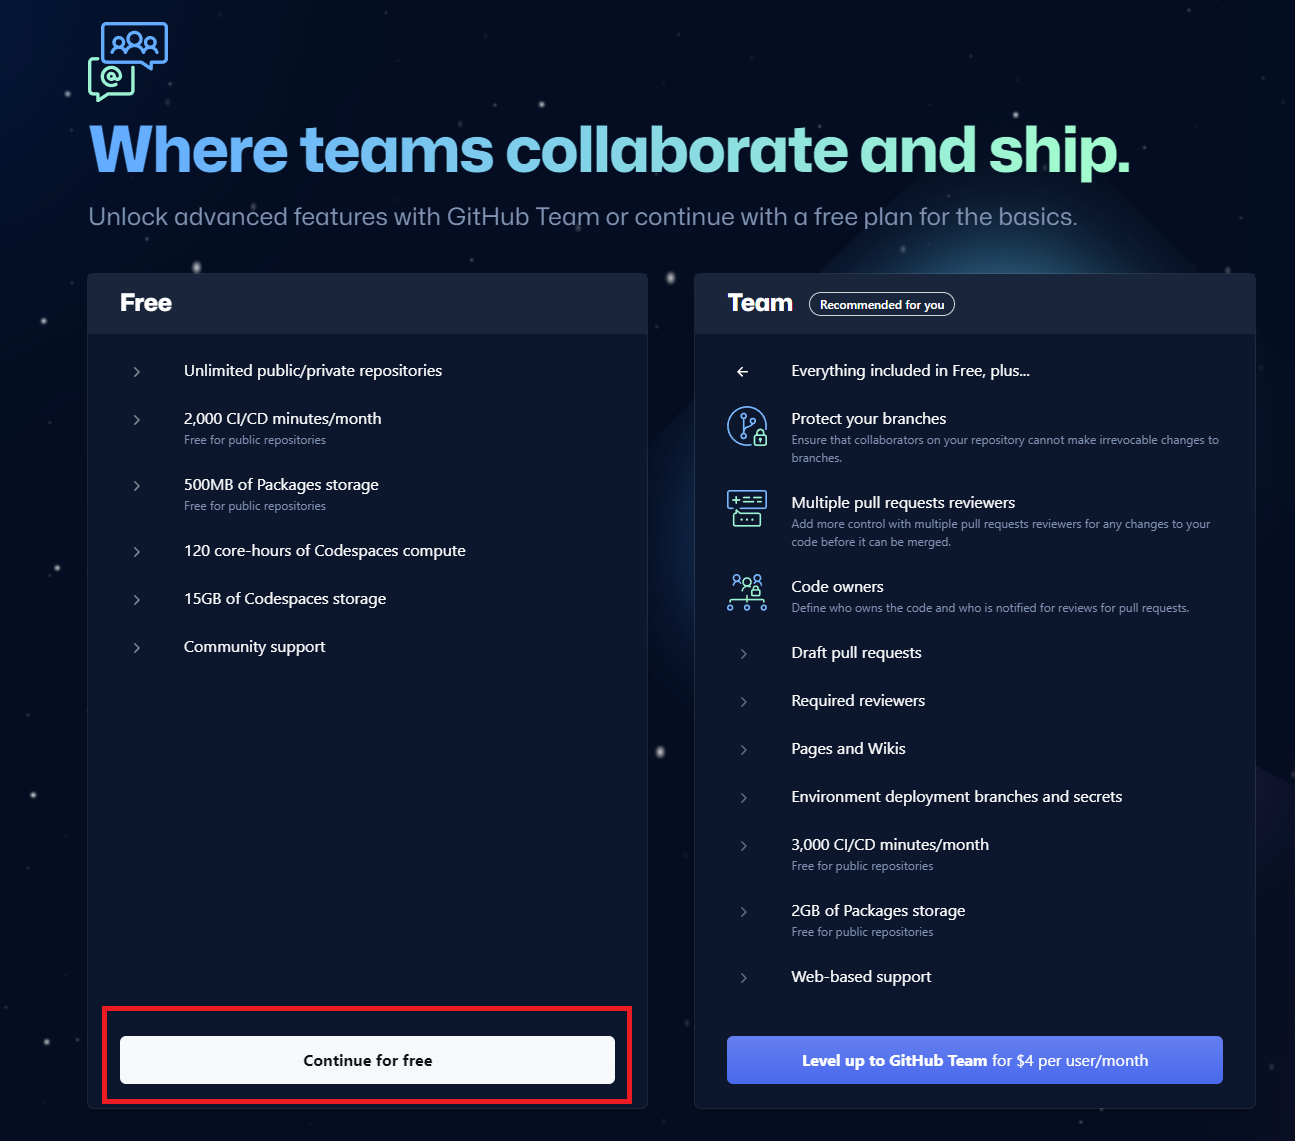
「Continue fore free」を選択
下記の画面になったら登録は完了です。
個人アクセストークン作成
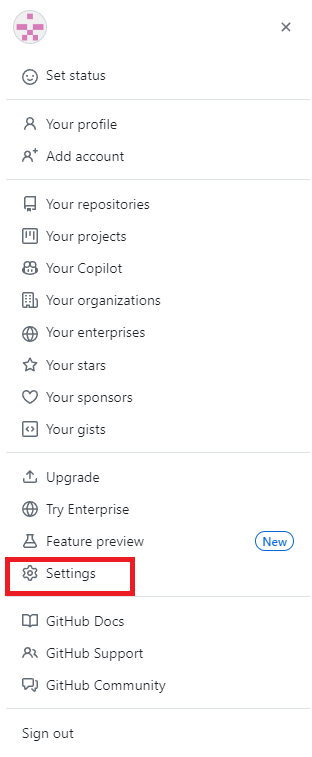
画面右上のプロフィール画像クリック→Settingsクリック
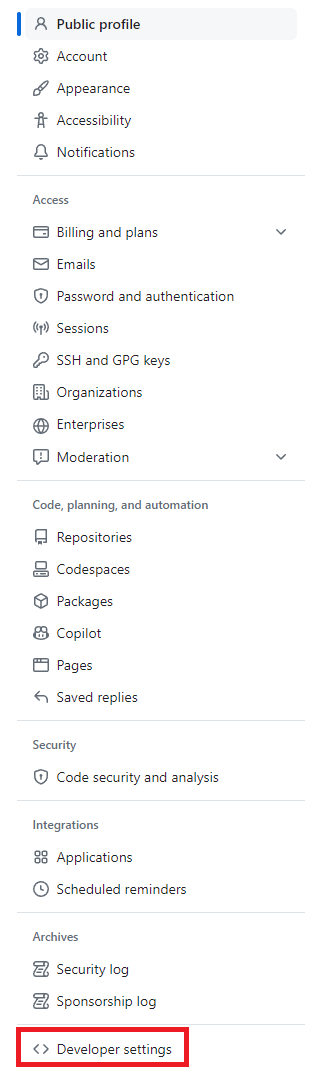
左の一覧からDeveloper settings.クリック
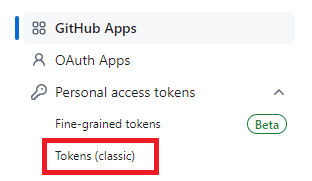
左の一覧からPersonal access tokens→Tokens(classic)クリック
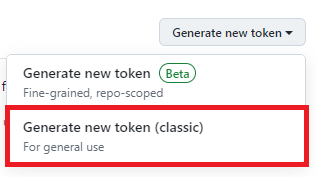
右上のGenerate new token→Generate new token(classic)クリック
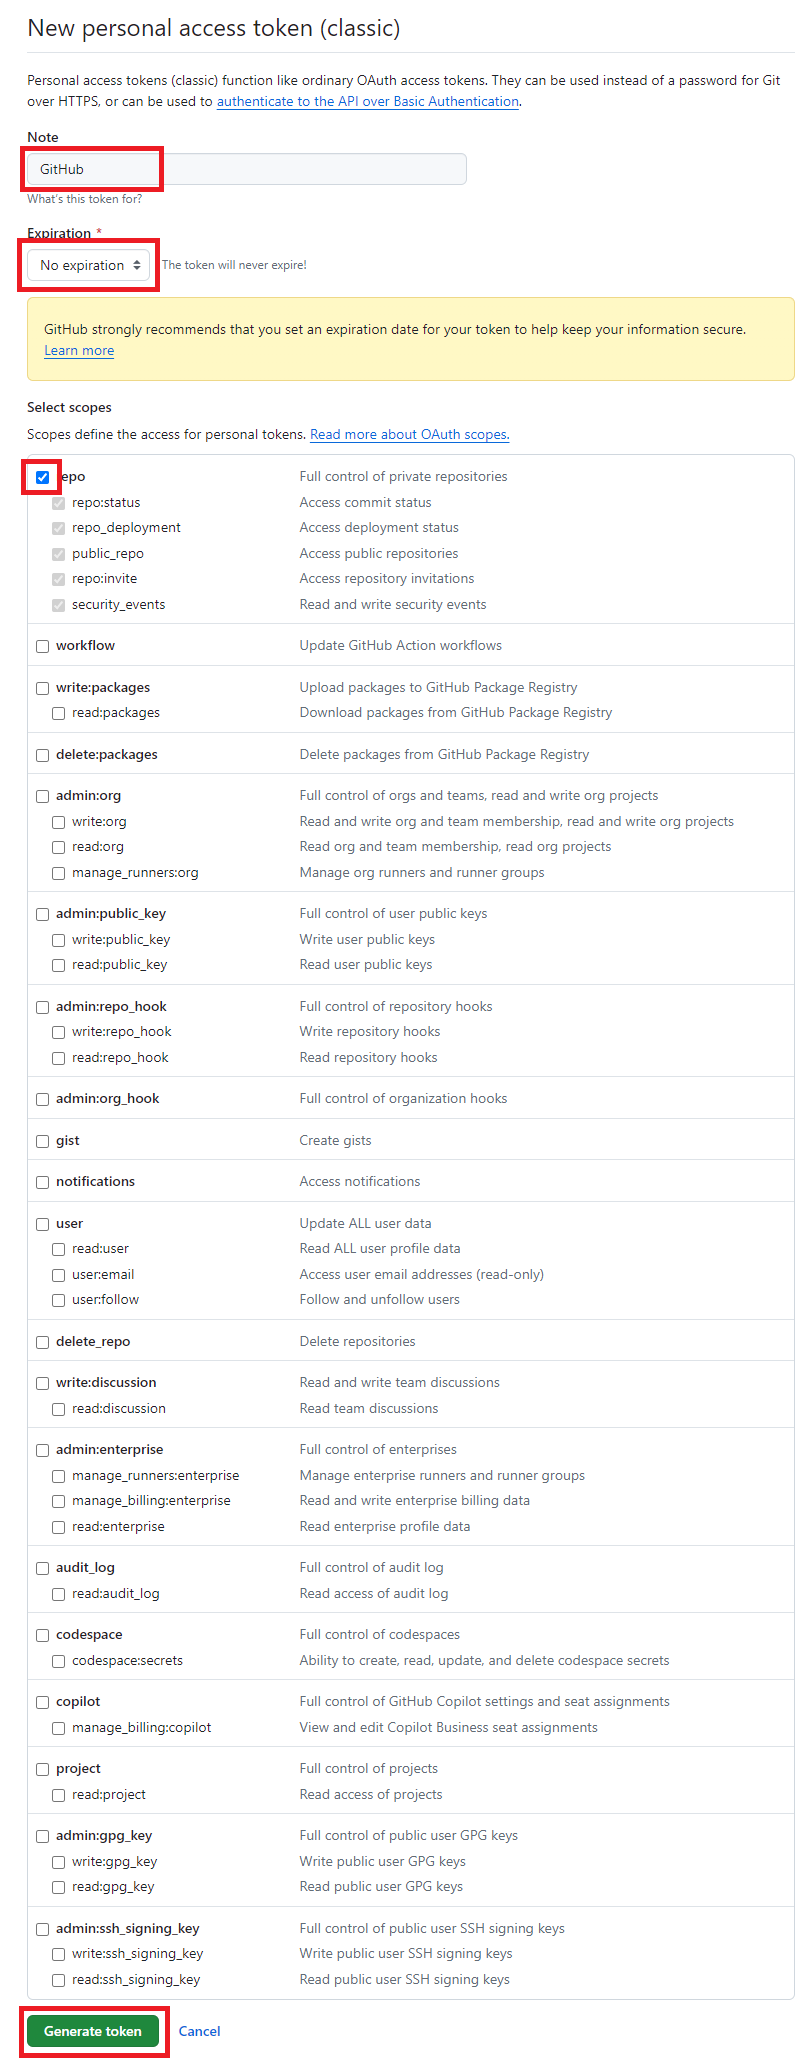
Note、Expiration(有効期限)、Select scopesはrepo(リポジトリを操作の権限)にチェックをしてGenerate tokenを押す。
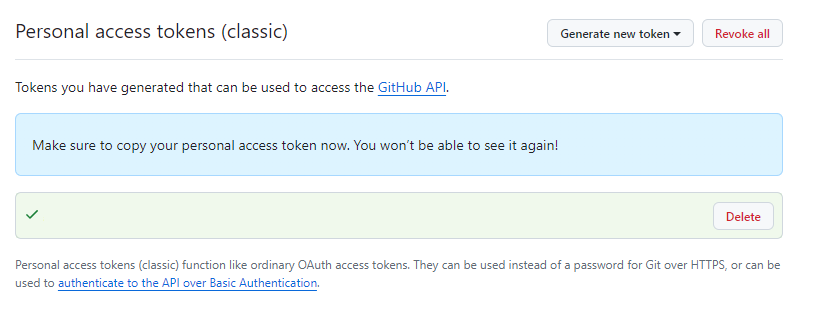
緑のボックスの所にトークンが表示されているのでコピーするなどして控えておく
※作成したトークンは二度と見ることが出来ないので注意!
再発行は可能です
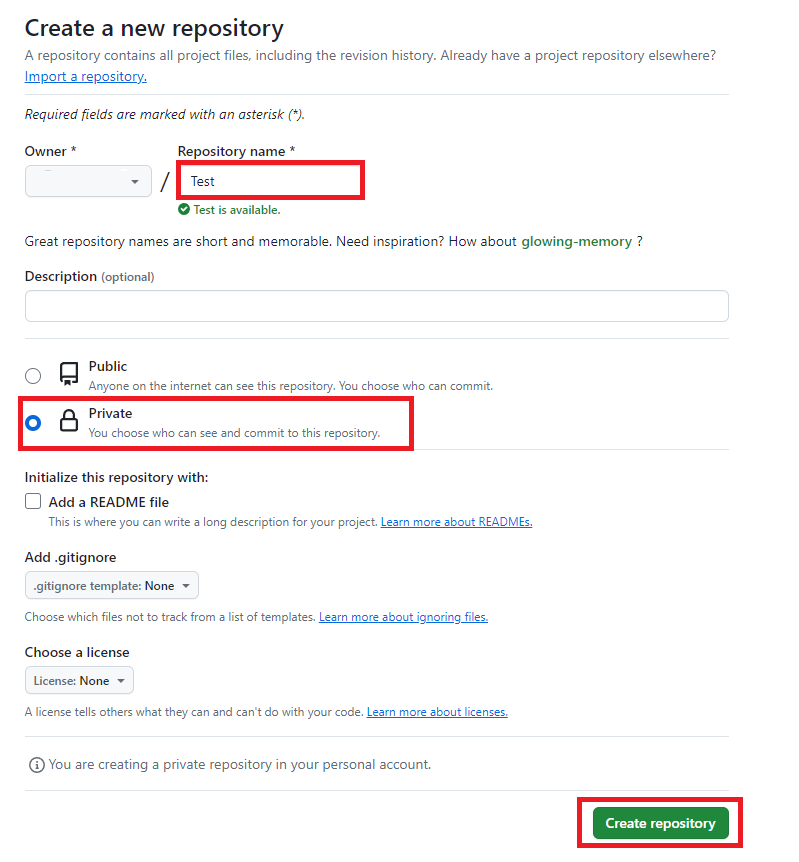
GitHubにてリポジトリを作成
1.テキストボックスにリポジトリ名(例:JavaBasic)を入力し、Create a new Repositoryボタンをクリック
2.赤丸のコピーボタンをクリックしてURLをコピーしておく

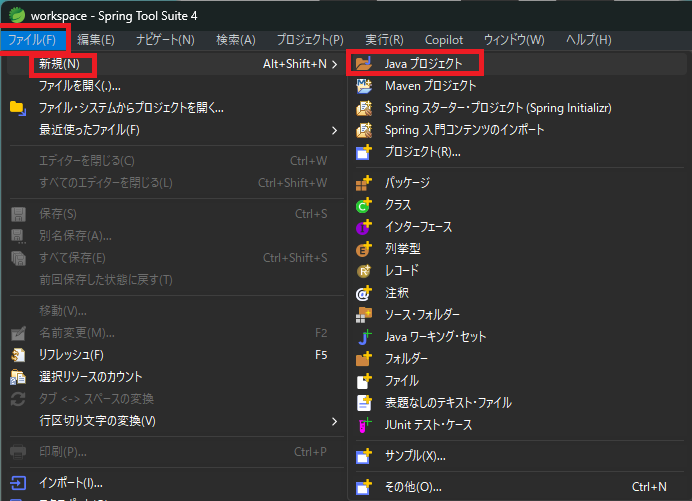
EclipseにてJavaプロジェクトを作成
ファイル→新規→Javaプロジェクトをクリック
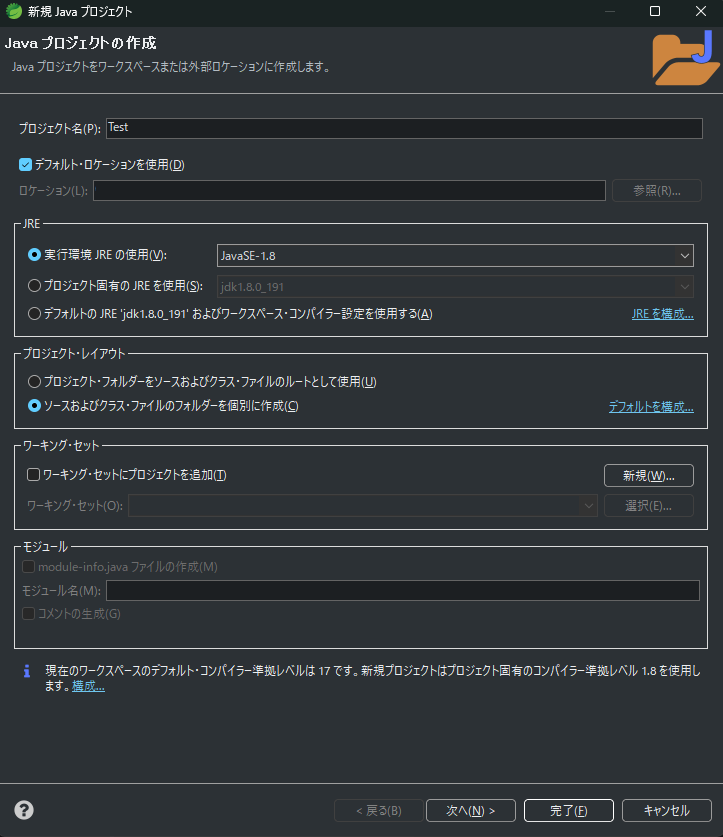
プロジェクト名にGitHubで作成したリポジトリ名をを入力して完了ボタンをクリック
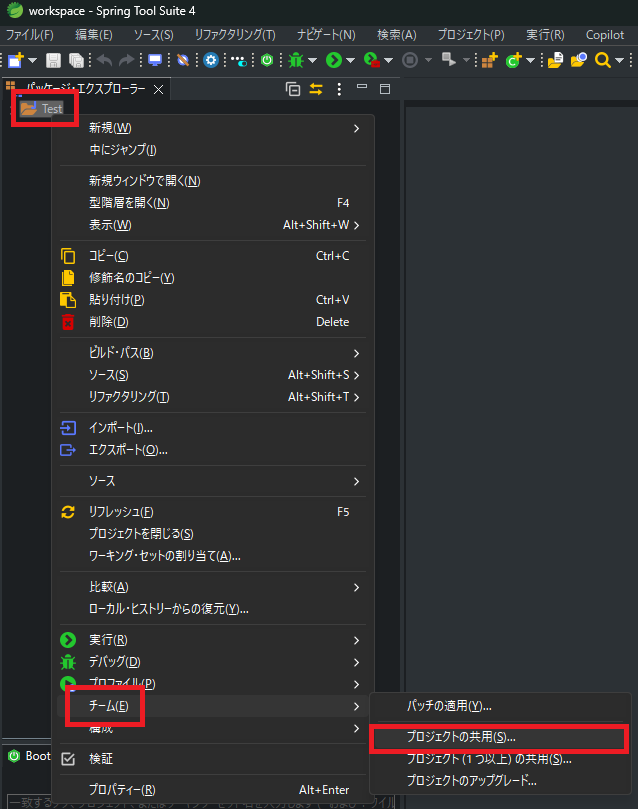
作成したEclipseのプロジェクトをGitHubに登録
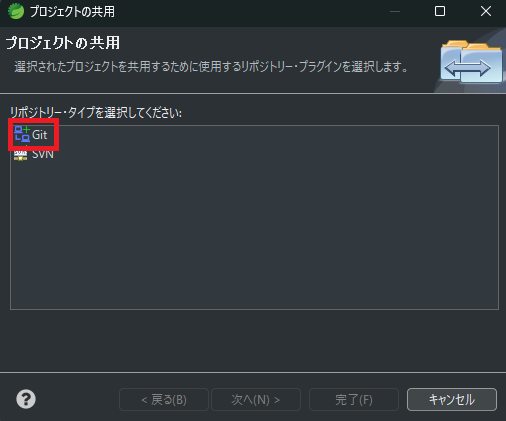
プロジェクトの上で右クリック→チーム→プロジェクトの共用
Gitを選択し、次へボタンをクリック
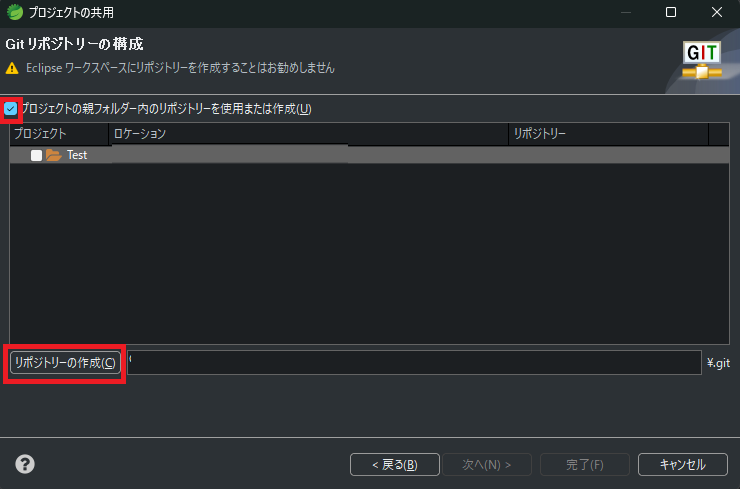
プロジェクトの親フォルダー内のリポジトリーを使用または作成にチェック
JavaBasicプロジェクトを選択
リポジトリーの作成ボタンをクリック
完了ボタンをクリック
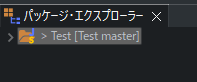
下記の様になっていれば登録完了
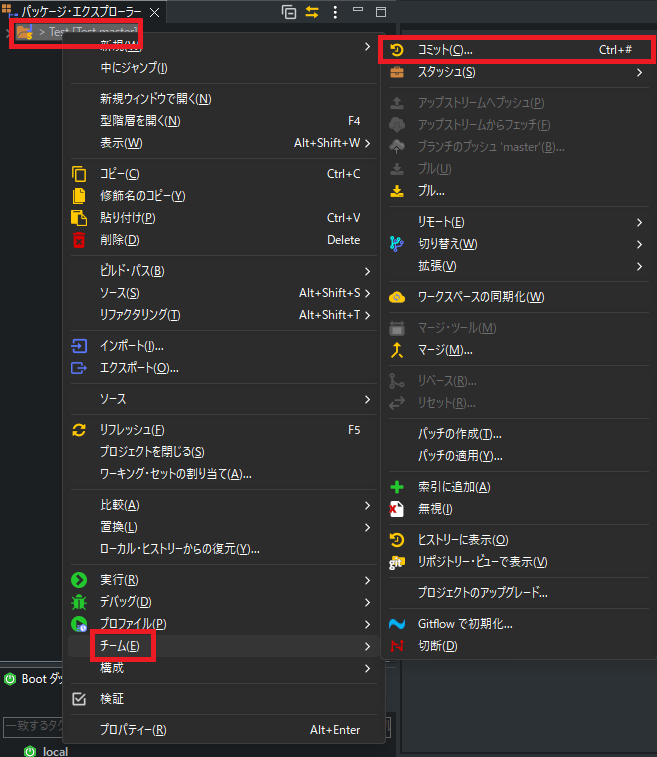
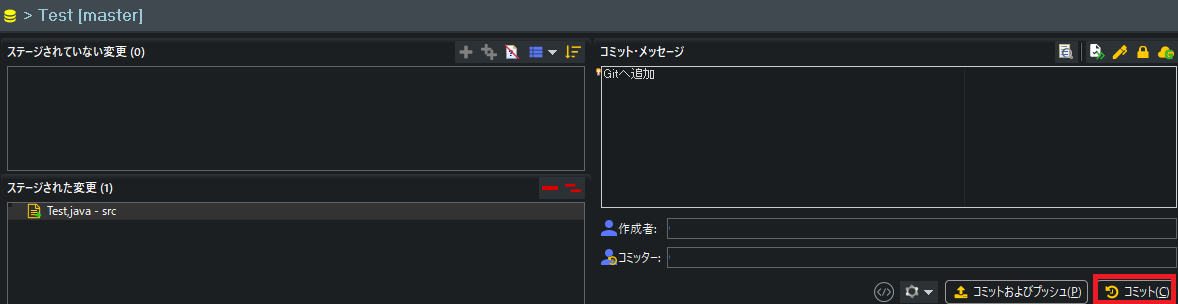
プロジェクト名の上で右クリック→チーム→コミット
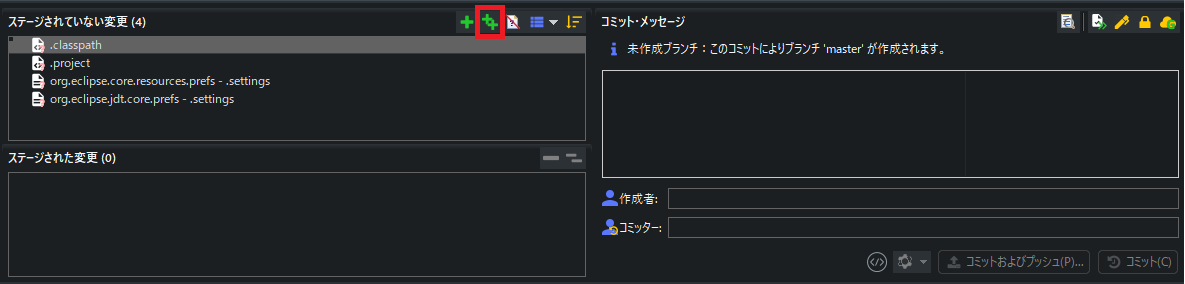
ステージされていない変更のファイルを全て選択しステージされた変更へ移動
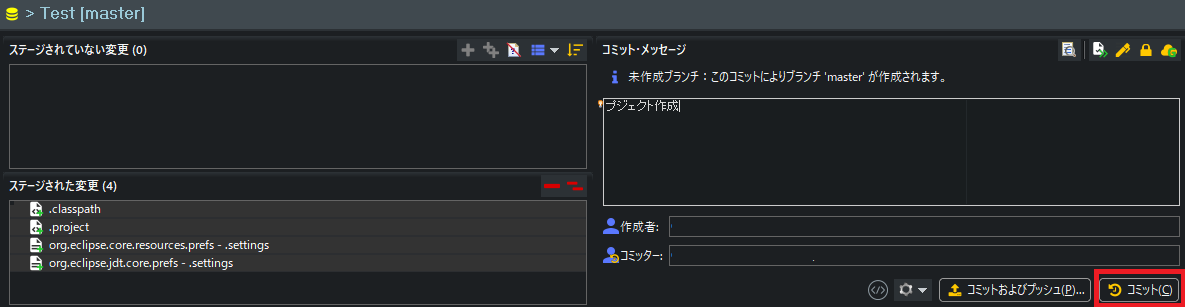
コミットメッセージを入力
コミットボタンをクリック
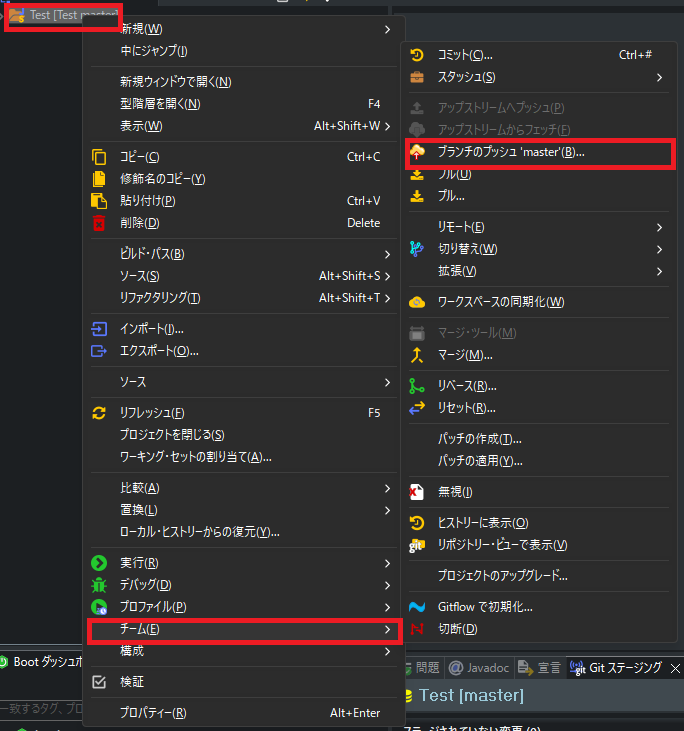
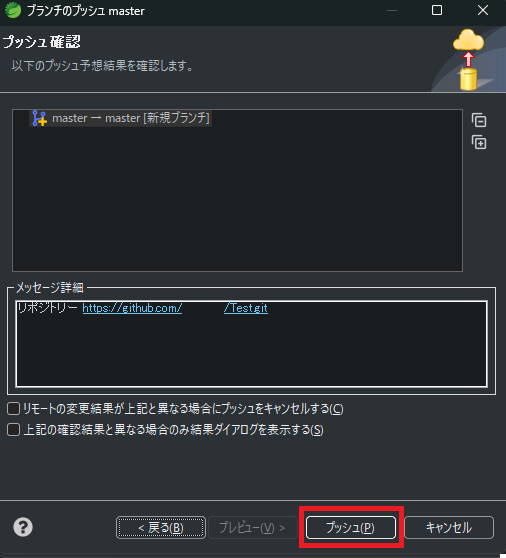
プロジェクトの上で右クリック→チーム→ブランチのプッシュmaster
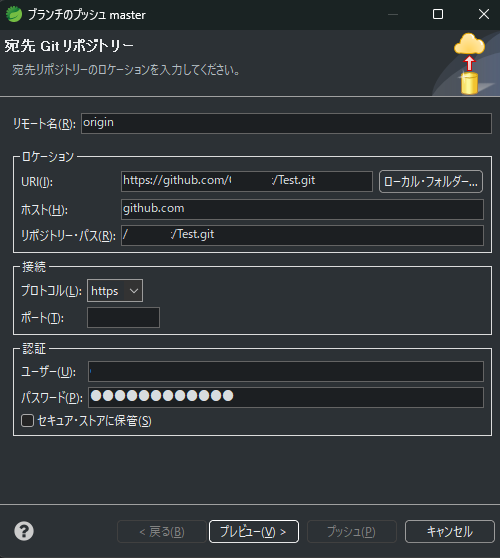
URIはGitHubのURLと同じ
ユーザ名とパスワード(個人アクセストークン)を入力
プレビューボタンクリック
プッシュボタンクリック
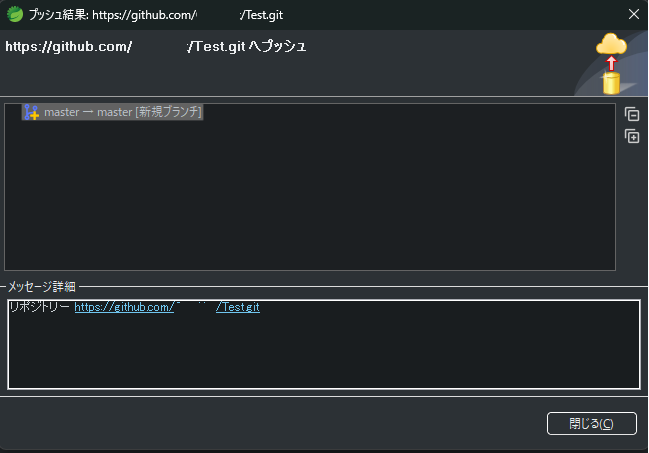
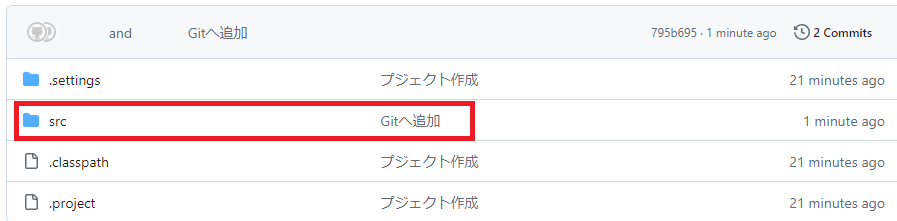
プッシュ成功のダイアログボックスが表示されたら、GitHubにアクセスしてJavaBasicリポジトリを表示すると、以下の様にプロジェクトがアップされている事を確認

Eclipseでクラスを作成し、コードを記述

ステージされていない変更のファイルを全て選択しステージされた変更へ移動
コミットメッセージを入力
コミットおよびプッシュボタンをクリック
GitHubにアクセスすると反映されている事を確認