もくじ
1. 前提
【バ美肉】Voicemeeter Potatoとstudio One にてボイチェンのやり方(ELASTIQUE PITCH)【ボイスチェンジャー】
上記の環境が整ってる前提で話を進めますので、まだ設定してない人は上記のURLの状態まで環境を構築してください。
PitchToMIDIとは声の高さに応じてMidiのノートを出力するアプリケーションです。
2. PitchToMIDI / loopMIDI のダウンロードと設定
PitchToMIDI と loopMIDI をダウンロード/インストールして起動します。
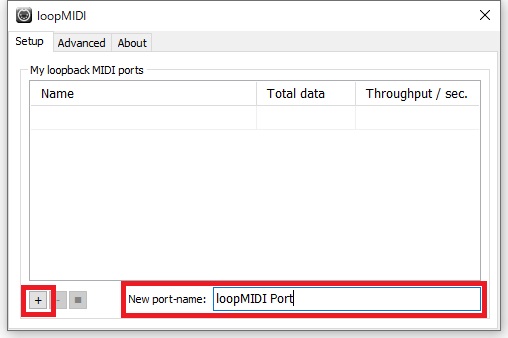
loopMIDIの設定
「New port-name;」にお好きな名前を入力し「+」ボタンを押下します。
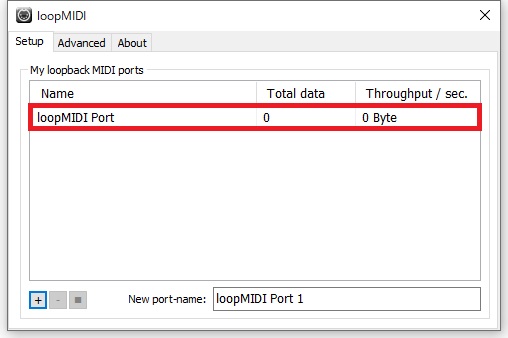
「My loopback MIDI ports」に表示されたらOKです。
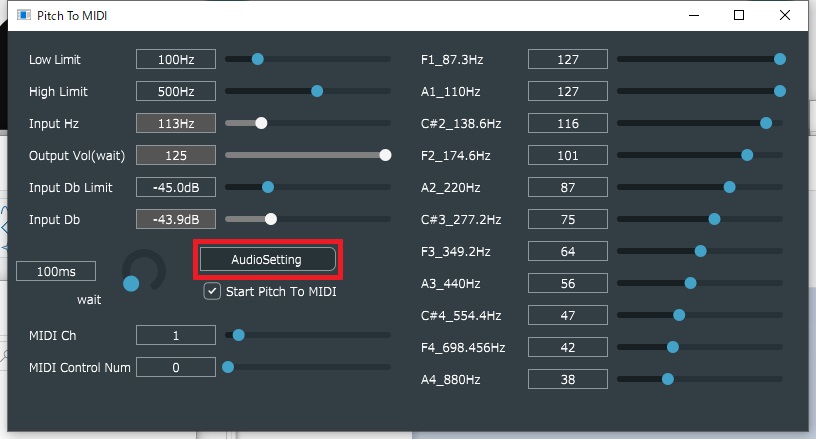
PitchToMIDIの設定
「AudioSetting」を押下します。
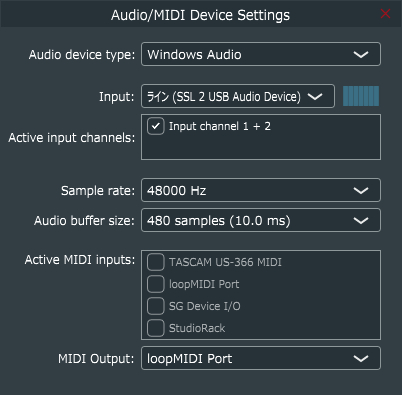
下記の様に設定を行ってください。
※ InputはVoicemeeterで設定しているデバイスを選択してください。
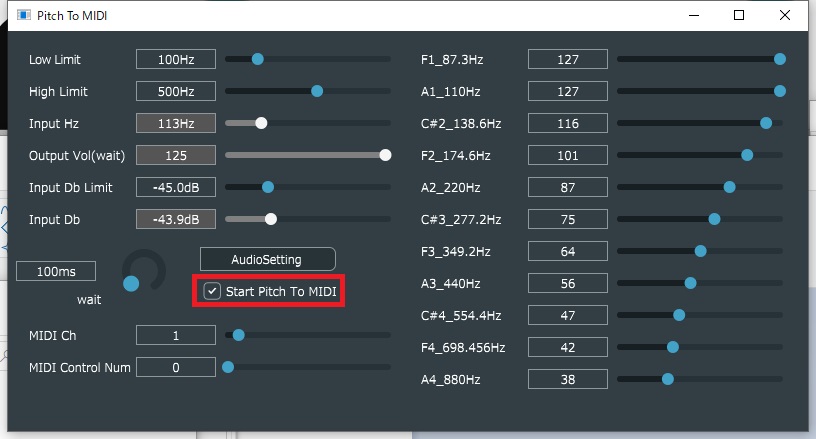
設定が終わったら「Start Pitch To MIDI」にチェックを入れます。
※ Pitch To MIDIの設定値は下記の状態にしておけば問題はありません。
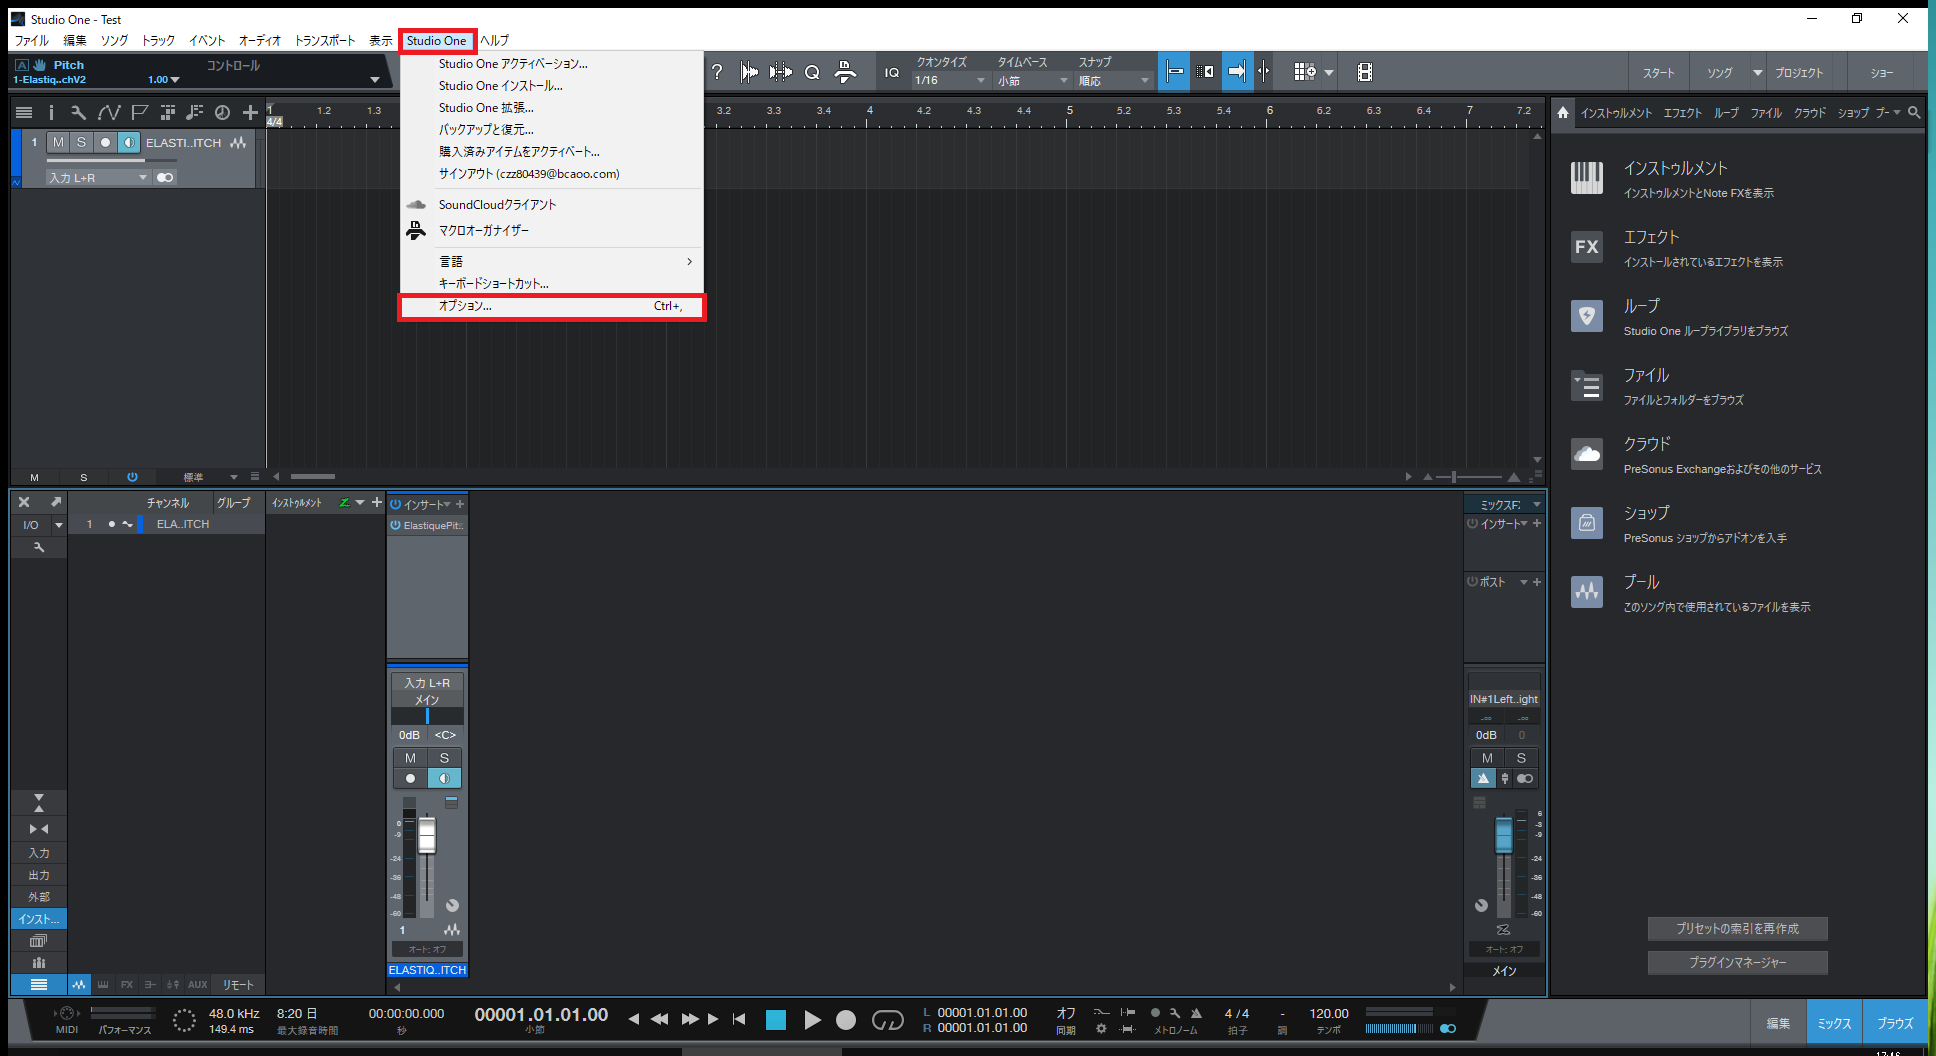
4. studio Oneの設定
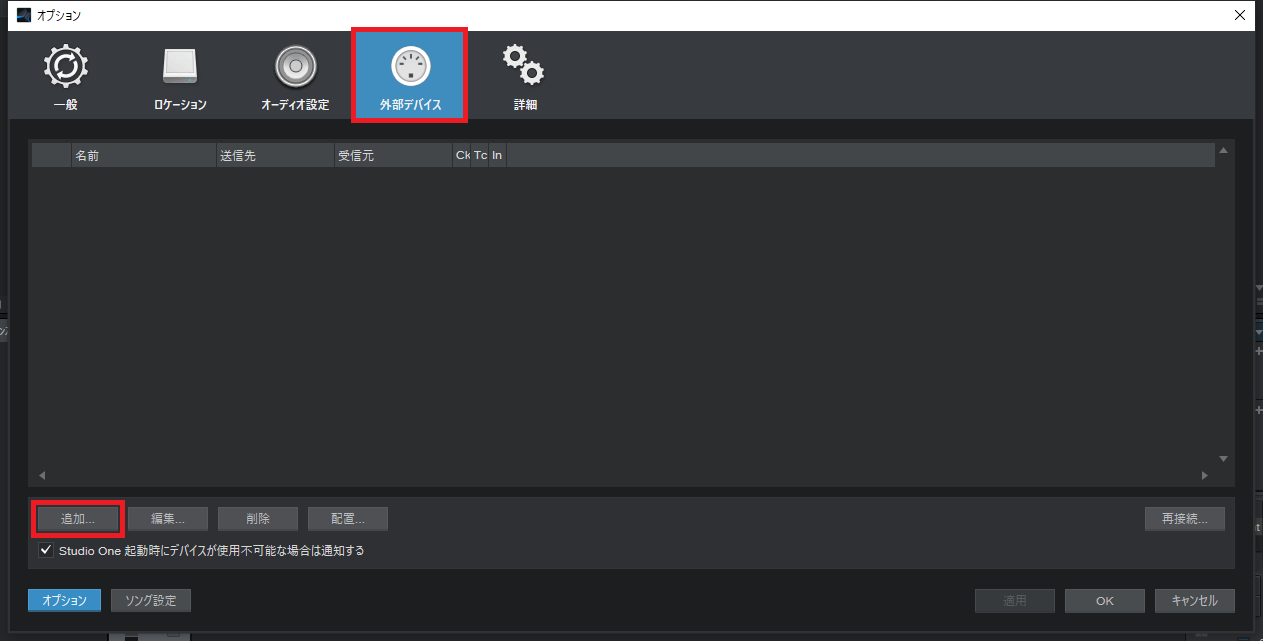
上部メニューの「Studio One」→「オプション」を押下
「外部デバイス」タブにて「追加」押下
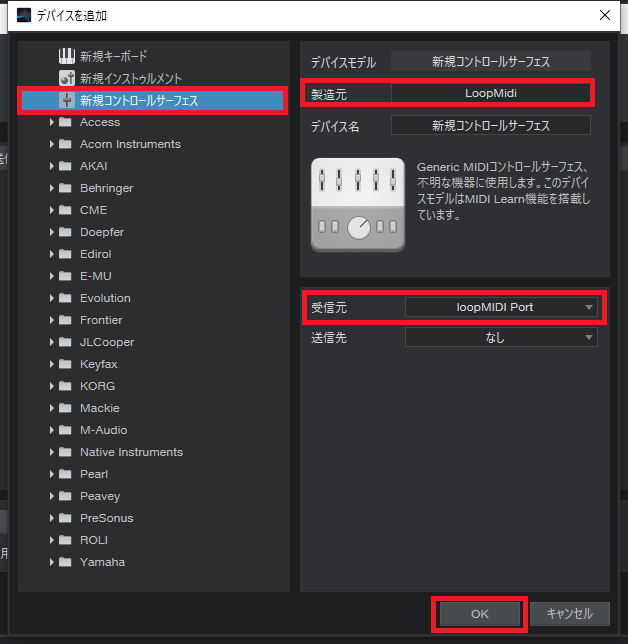
「新規コントロールサーフェス」を選択し「受信元」を「loopMidi Port」を選択し「製造元」「デバイス名」に名前を入力して「OK」を押下します。
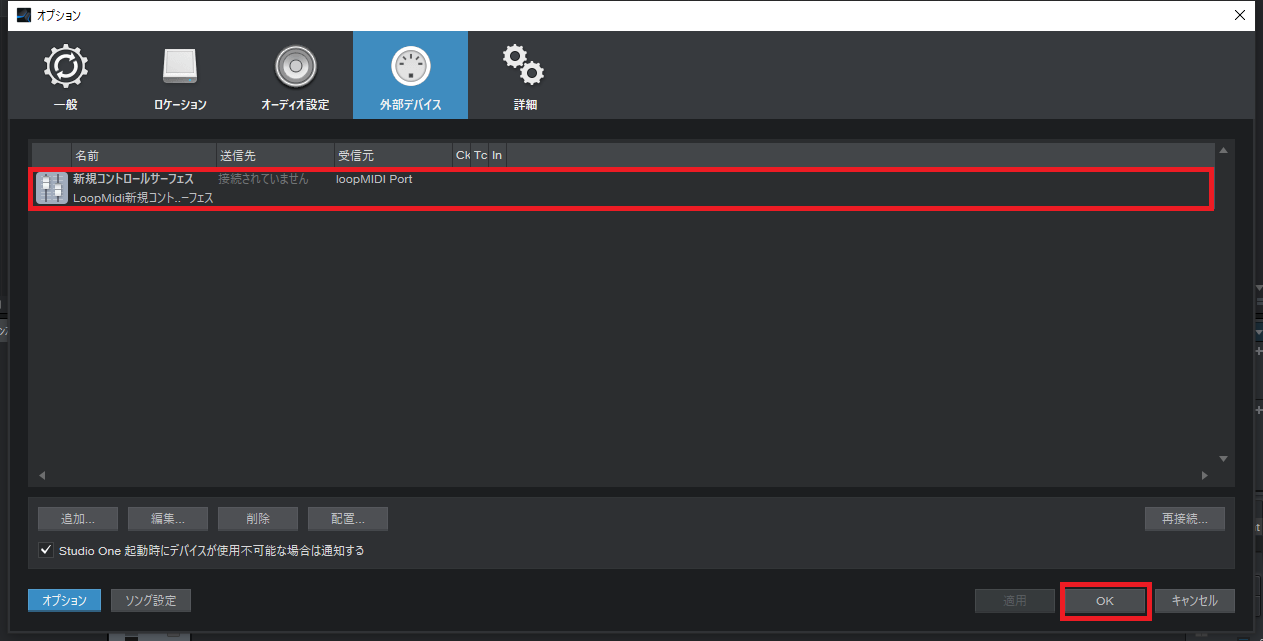
LoopMidiが追加されていることを確認し、「OK」を押下します。
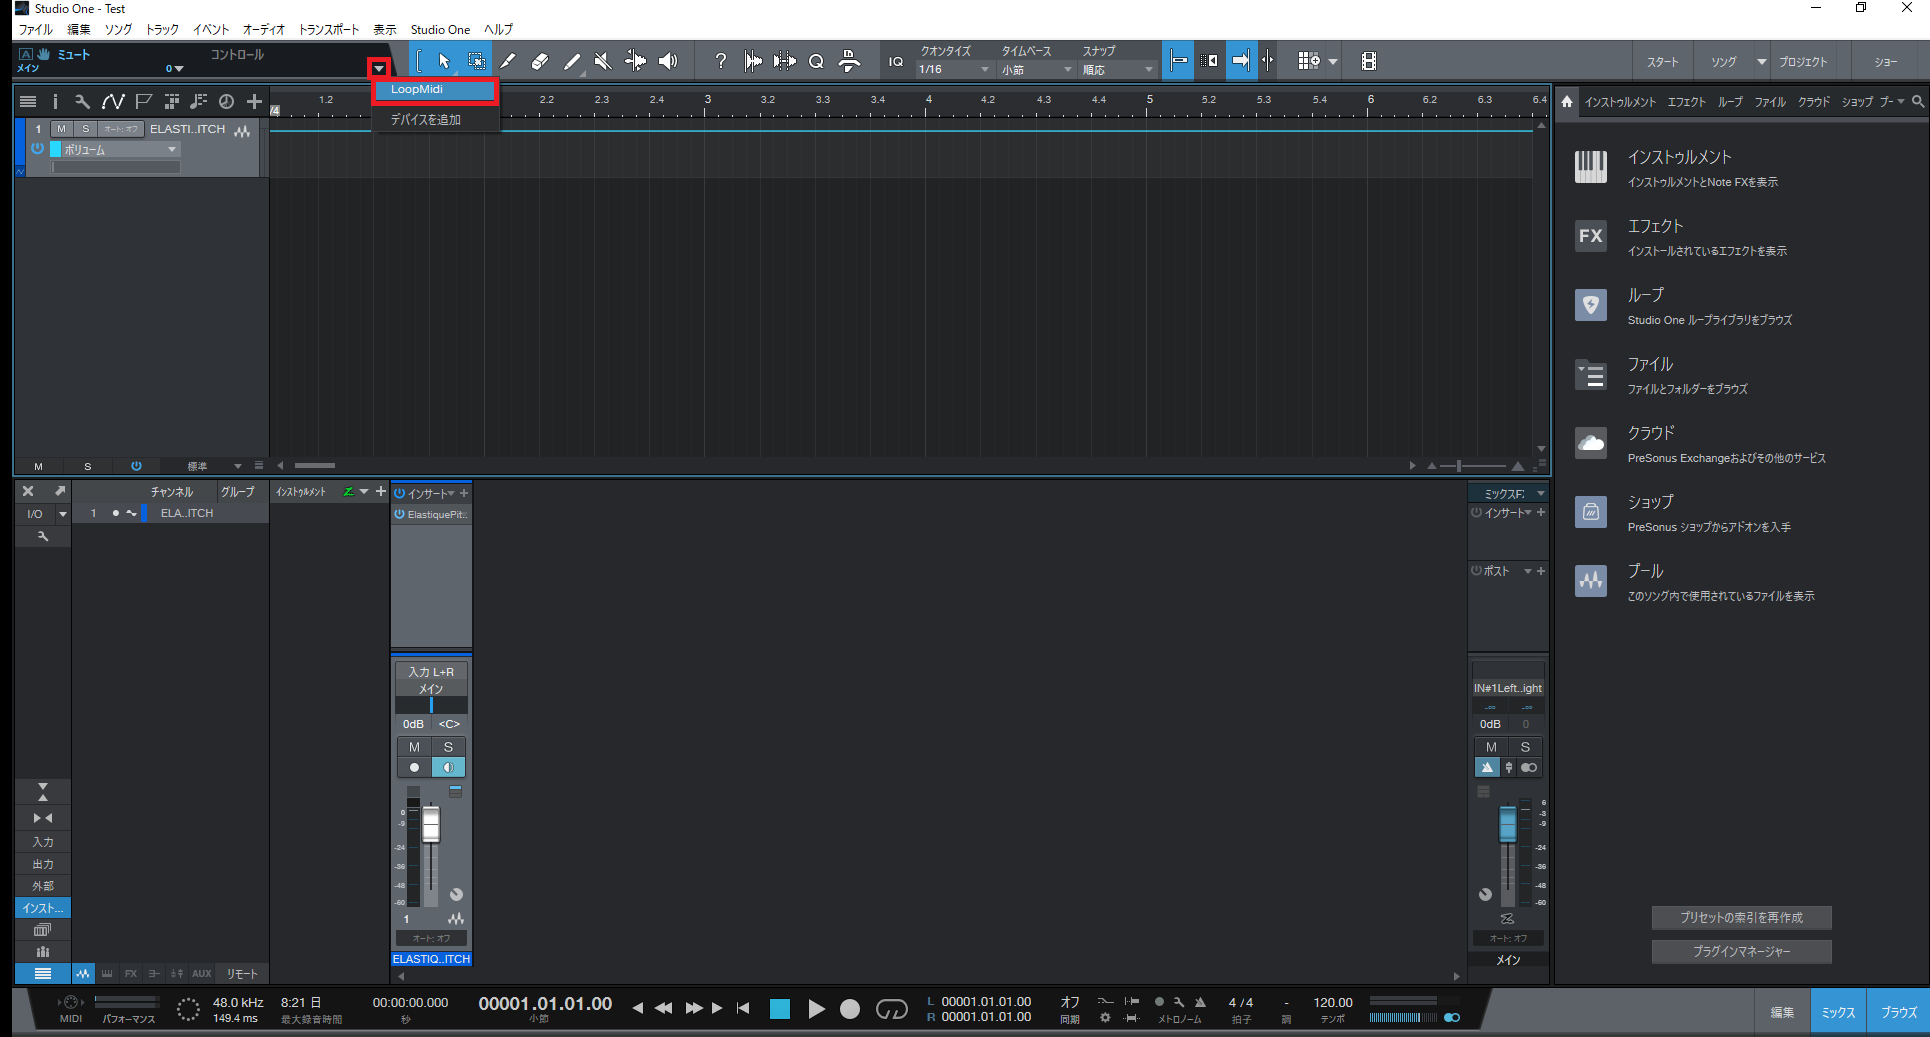
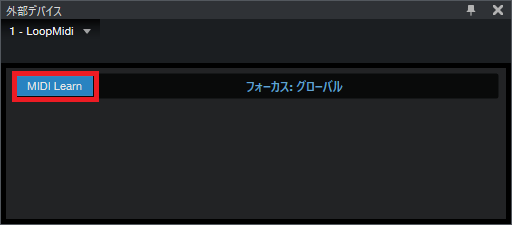
画面上部にある「コントロール」の∇をクリックし先ほど作成したLoopMidiを選択します。
「Midi Leam」が初期状態だとOFFの状態なのでクリックをしてON状態にします。
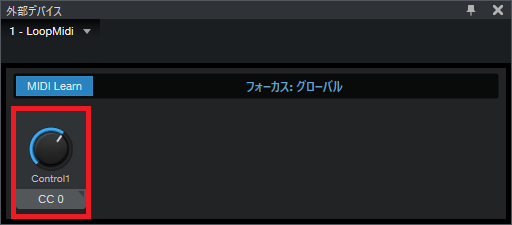
マイクに向かって何か喋り下部にコントロールノブが出てきたら
PitchToMIDI → LoopMidi → studio OneへのMidiデータの送信は成功しています。
ミックス画面から追加したELASTIQUE PITCH 2を開きます。
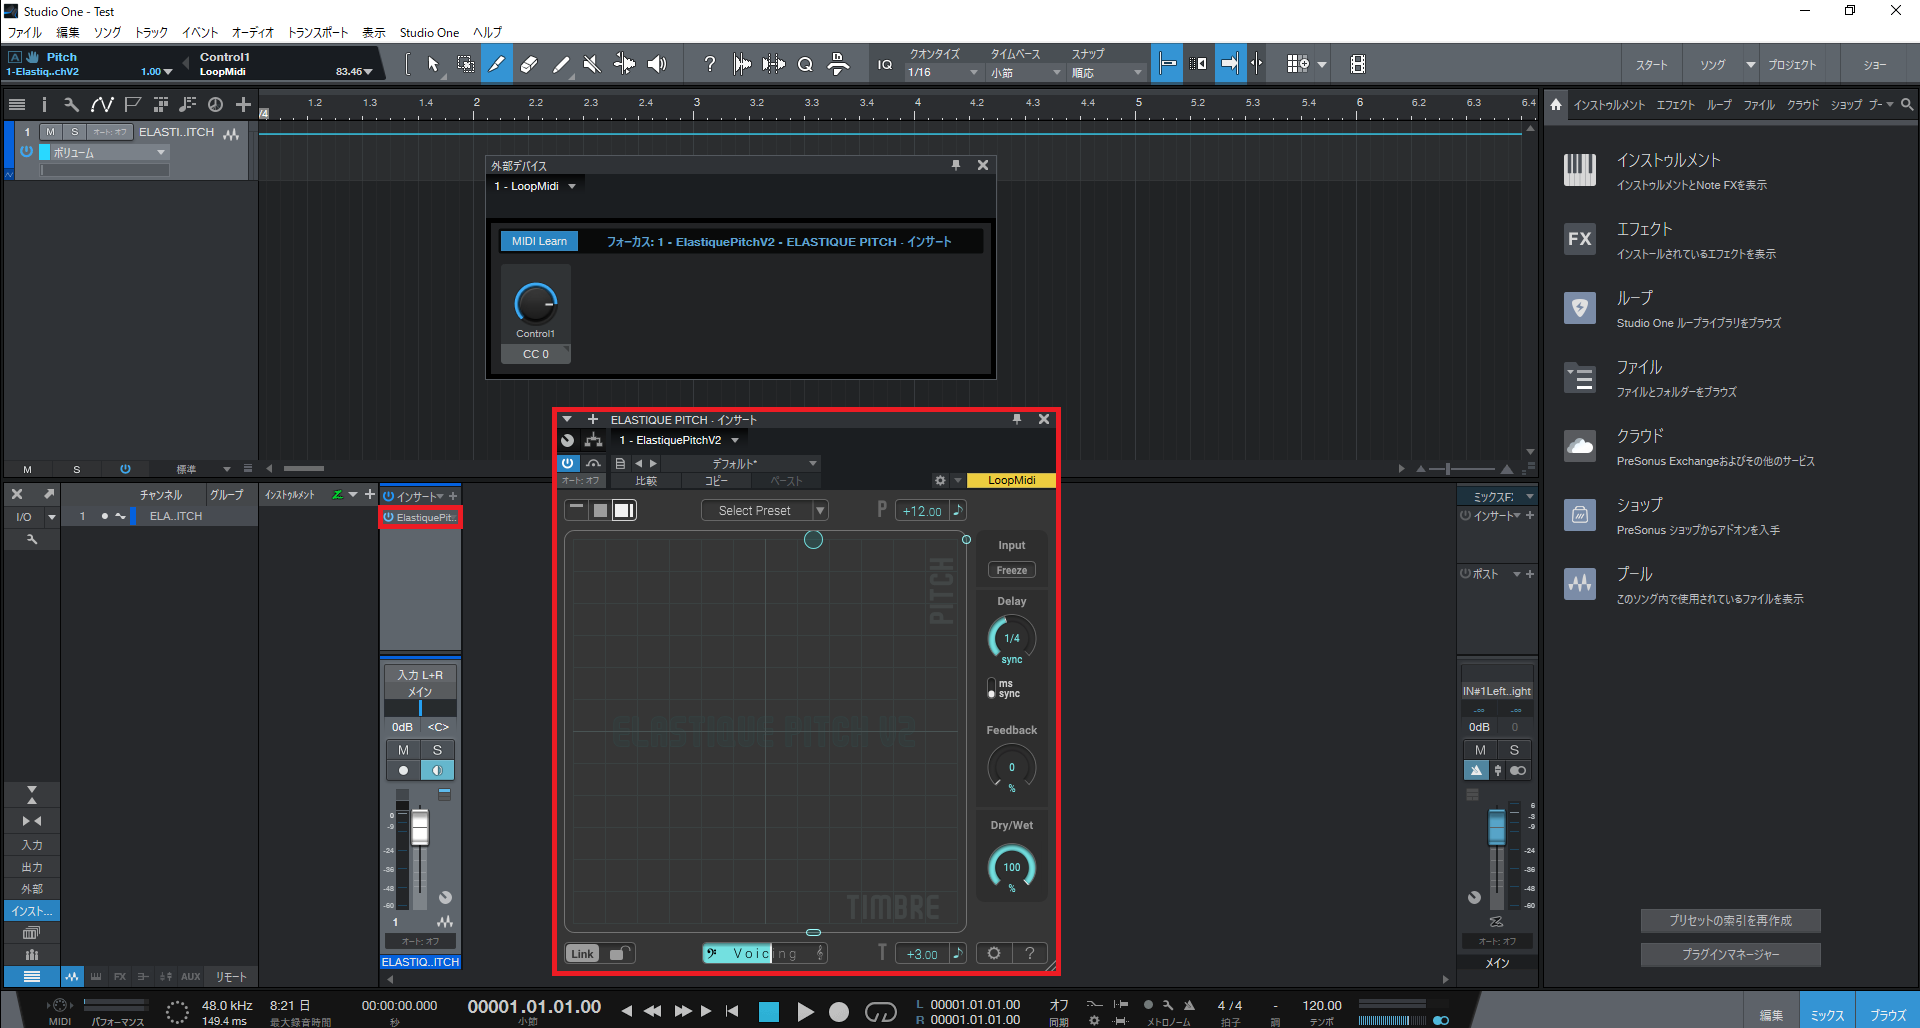
ELASTIQUE PITCH 2のVoicingの値を適当に弄ります。
Voicingの値が変更されると左上の手のマークの右側にVoicingになっていることを確認します。

左上にあるMidi設定を行う画面にて◀をクリックします。

以上にて設定は完了になります。
5. 動作確認
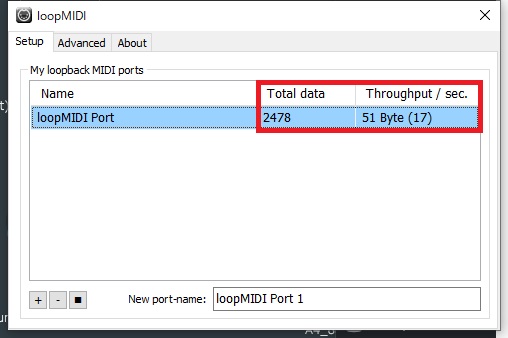
実際にマイクに向かって何か喋って見てください。
Total data / Throughput / sec..に数値が入力されれば成功です。
PitchToMIDIで正常に動いているか確認してください。
またCantabileのELASTIQUE PITCH 2の「Voicing」の値もマイクに向かって何か喋って変化してることを確認してください。